Introduction
After reaching the limits of my Ender, I decided to switch to a Bambu Lab printer.
With the Ender, I spent a lot of time adjusting settings again and again just to get consistent, decent results. It worked, but it was a constant tuning loop.
With the Bambu Lab, things were different right away. It worked out of the box, and I could focus more on projects instead of calibration.
That change led to my biggest print so far.
The Idea
One day I came across a large New York City print and immediately liked the aesthetic. New York Map
The final size was huge for my standards: 70 cm by 120 cm, split into 28 tiles.
At first, I was mostly thinking about whether I could actually pull it off and how I would mount it cleanly once all parts were done. I decided to start anyway and solve problems one by one.
Printing the 28 Tiles
The printing phase was straightforward but long. Tile by tile, the city started to come together and take shape on a side board behind me in my office room and occupying soon a significant portion of the space.
After a while, I had almost all parts printed and the project finally looked real. At that point, the harder part started: finding a stable base plate for that size.
Mounting Challenges
My first idea was acrylic, but getting the right size and thickness was surprisingly difficult and expensive.
So I went with Forex instead and ordered a plate sized 128 cm by 78 cm. That gave me a 4 cm border around the print on all sides.
When it arrived, I realized it was not stiff enough on its own.
I first added a metal frame on the back made of flat bars, but it still flexed too much. The final fix was gluing two L-profiles to the back on the longer side on top of the flat bars, which made the whole plate rigid enough.
Before attaching everything, I drilled holes in the profiles so I could hang the full piece on the wall later.
Final Assembly
For attaching the tiles, I used Orabond double-sided tape.
To make placement cleaner and more secure, I built a support out of magazines underneath so the plate could lie flat on the table while I pressed from the top. That helped each tile bond properly and stay in place.
After the final tiles were in, the result looked exactly how I hoped.
Final Result
The finished piece is very stiff, looks great on the wall, and weighs about 6 kg.
This project was a good reminder that large 3D prints are not only about printing time. A big part of the work is structural planning, mounting, and solving problems that only show up at full scale.
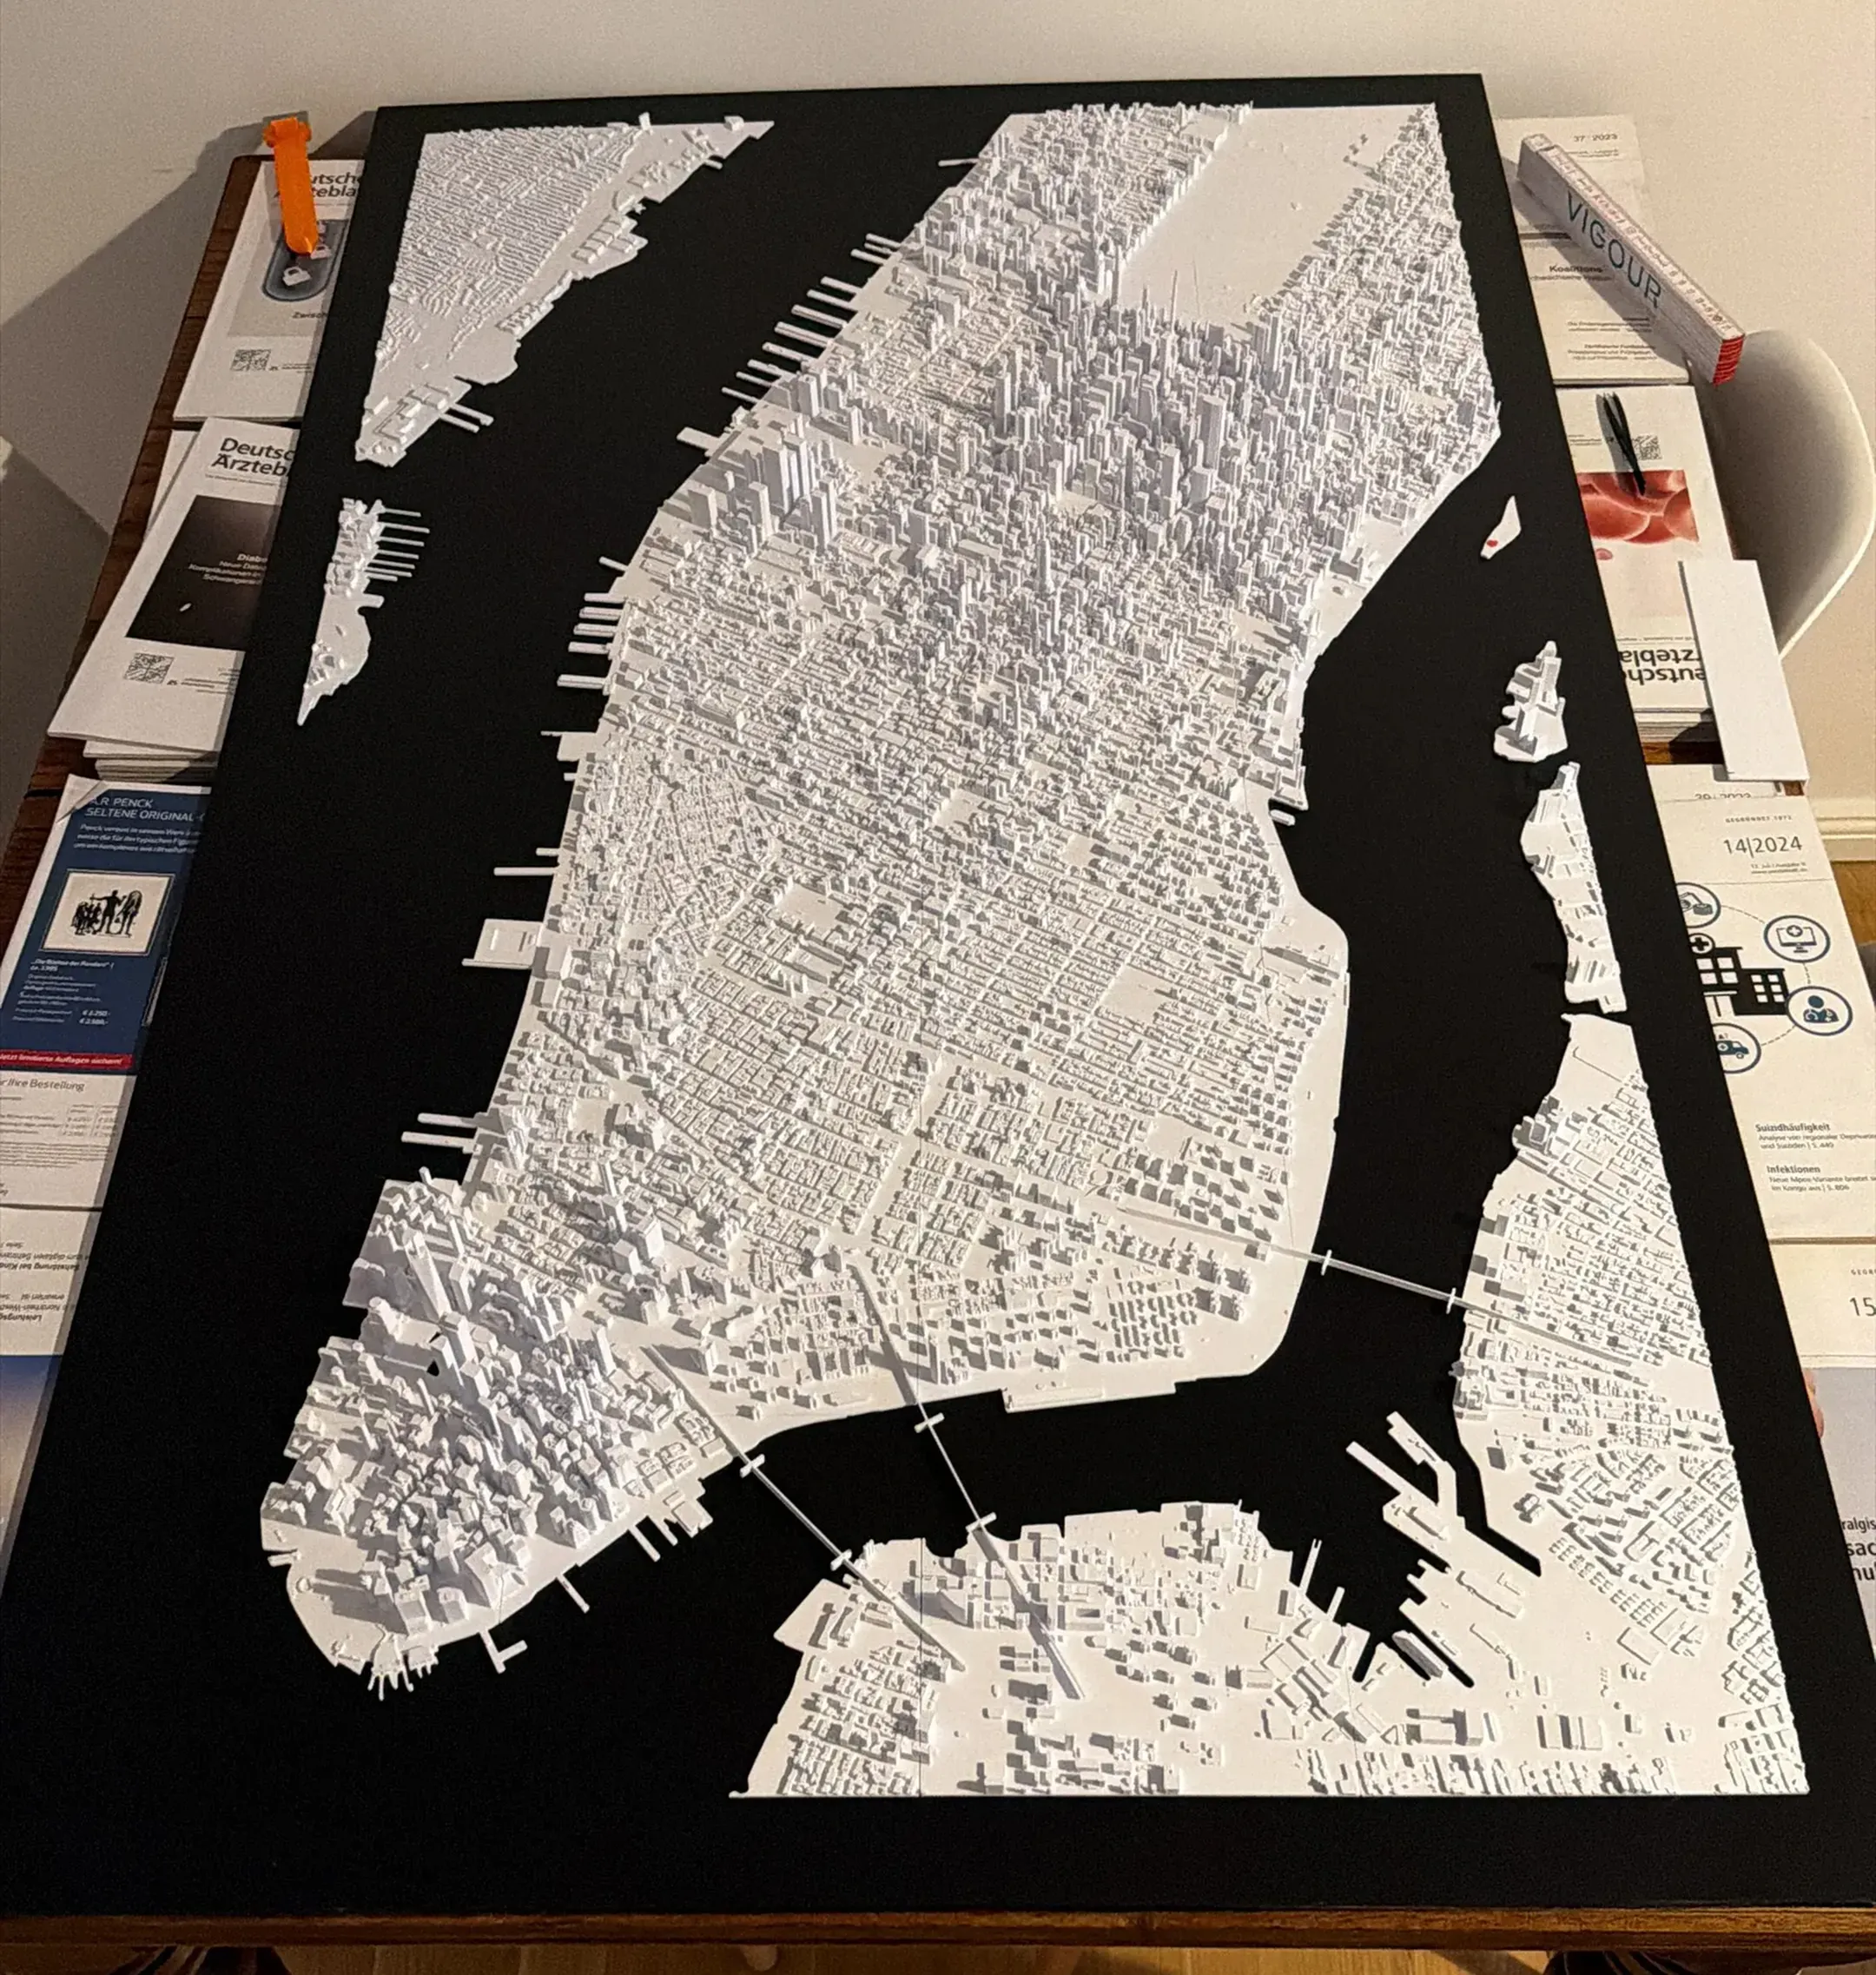
The finished New York City wall piece after assembling all 28 tiles.