Introduction
My entry into 3D printing was not glamorous. It started with an Ender V3 SE, a pile of test prints, and the usual beginner routine of fixing first-layer issues, tuning settings, and slowly learning which problems are “printer problems” and which are just “me problems.”
For a while, that was enough. I was happy downloading models, printing useful little upgrades, and getting the machine dialed in. But once the printer became reliable, I started looking for projects where the print was not the end result, but only the starting point.
That is when I stumbled into the world of people printing parts for actual machines. Not desk toys. Not organizers. Real builds with motors, flight controllers, batteries, and enough spinning hardware to demand respect.
For me, the tipping point was a build video by Michael Rechtin, specifically this one:
https://www.youtube.com/watch?v=h6chNEaXb-o
I watched it and had the very rational thought: I’m going to build a drone myself, even though I never flew a drone and my last soldering attempts were questionable at best.
This post documents the process in a way that is meant to be honest and useful: what I built, what I bought, what I wired wrong, and what finally got the drone into the air.
3D Printing the Frame
The first decision was also the one that most drone people will warn you about. I printed the frame.
A printed frame is usually worse than carbon fiber. It is less stiff, it can flex in ways that mess with flight behavior, and it is not exactly famous for surviving crashes. But I still went for it because printing the frame was the point of the project for me. I wanted something I could iterate on cheaply, customize, and understand from the ground up, even if it was not the optimal choice.
Luckily, the designer from the video shared the models, so I did not start from scratch. I kept it simple at first and printed only the essentials: the center body and the arms.
Model:
https://makerworld.com/en/models/236234-100mph-fpv-race-quad#profileId-269467
It took a few failed prints and some tuning, but eventually I had a complete frame sitting on my desk. Holding it in my hands flipped the whole thing from “YouTube inspiration” into “okay, this is now a real object with real constraints.”
Choosing the Components
Once the frame was done, the next step was electronics. That is where you can easily lose a weekend just reading opinions.
There are endless discussions about what to buy, what to avoid, where you can save money, and where you absolutely should not. Since this was my first build and I wanted to keep the cost and complexity reasonable, I made one big simplifying choice: no video system for now. My only goal was “get it flying.” Everything else could come later.
Here is what I ended up using:
- ELRS receiver: ELRS NANO RX24 2.4G
- Flight computer + ECS: SpeedyBee F405 V4
- Motors: Axisflying AE2207
- Propellers: HQProp 5 Sets EthiX
- Battery: Tattu 1300mAh 4S 75C Lipo Battery Pack
- LiPo Charger
- Remote control: Radiomaster Pocket ELRS Remote
- Batteries for remote control (if not included)
And then there is the quiet part nobody tells you about: tools and small stuff. A soldering iron, a heat-resistant mat, flux pens, a helping hand tool, wire management bits. Those purchases add up, and they arrive in a steady stream. At some point my wife started getting suspicious because it felt like AliExpress was delivering a daily reminder of my life choices.
Assembly & Soldering
This was the most “engineering-shaped” part of the whole project. You start with a pile of parts and try to turn it into a system.
I expected soldering to be hard, but I did not expect tutorials to be hard. There are lots of drone build videos, but fewer clear, follow-along guides for your exact flight controller and receiver combo. So I ended up pausing, rewinding, comparing against the manual, and trying to figure out whether I was about to solder something permanently wrong.
And I still made the classic mistake: I mixed up TX and RX when connecting the ELRS receiver to the flight controller.
The rule that finally stuck in my head is simple: output goes to input. TX is output and RX is input, so they need to cross.
That means your receiver wiring typically looks like this:
- 5V (RX) to 5V (FC)
- GND (RX) to GND (FC)
- TX (RX) to RX (FC), cross them
- RX (RX) to TX (FC), cross them
If you use pads T6 and R6 on the SpeedyBee board, you are using UART 6, which matters later in Betaflight.
The overall assembly process was straightforward, but not fast. I mounted the motors, soldered the battery leads to the ESC, routed and soldered the motor wires, connected ESC to FC, and then did the first bring-up tests before tidying everything.
What surprised me is how repetitive the workflow is in a good way. Solder a bit, test a bit, realize something is wrong, undo it, redo it, test again. It feels chaotic while you are in it, but it is actually a normal debugging loop, just with hardware instead of code.
Cable management also matters more than it looks like it should. Loose wires and spinning props are a terrible combination, and they usually announce themselves with a weird noise right before they become a real problem.
Binding the Controller & First Setup
Once the hardware was assembled, the next question was simple: is it alive?
I connected the flight controller to my computer and opened the Betaflight configurator at https://app.betaflight.com/. After some basic checks, I hit the first satisfying milestone. The motors spun in the configurator, stick inputs showed up correctly, and nothing got hot or smoky.
From there, the next step was making sure Betaflight knew where my receiver was connected. In the Ports tab, I enabled Serial RX on the UART I had soldered to, which was UART 6 in my case, saved, and rebooted. Then, in the Receiver tab, I set the receiver mode to Serial via UART and chose CRSF as the protocol, since ELRS uses Crossfire.
Binding was easier than I expected once I used the WiFi method. I powered on the drone, waited until the receiver entered WiFi mode, connected to its network, opened the configuration page at 10.0.0.1, and set a binding phrase. Then I did the same on the radio with the same phrase and the same spelling. Once that matched, the receiver LED went solid, which is the kind of small win that feels huge when you have been debugging wires.
The last step before flight is arming, and that is where things stop being theoretical. I mapped ARM to a switch, double-checked that the channel mapping made sense, and made sure the props were mounted correctly. If anything feels weird, do not “just try it.” Check the arming flags in Betaflight first, because they usually tell you exactly what is wrong.
First Flight
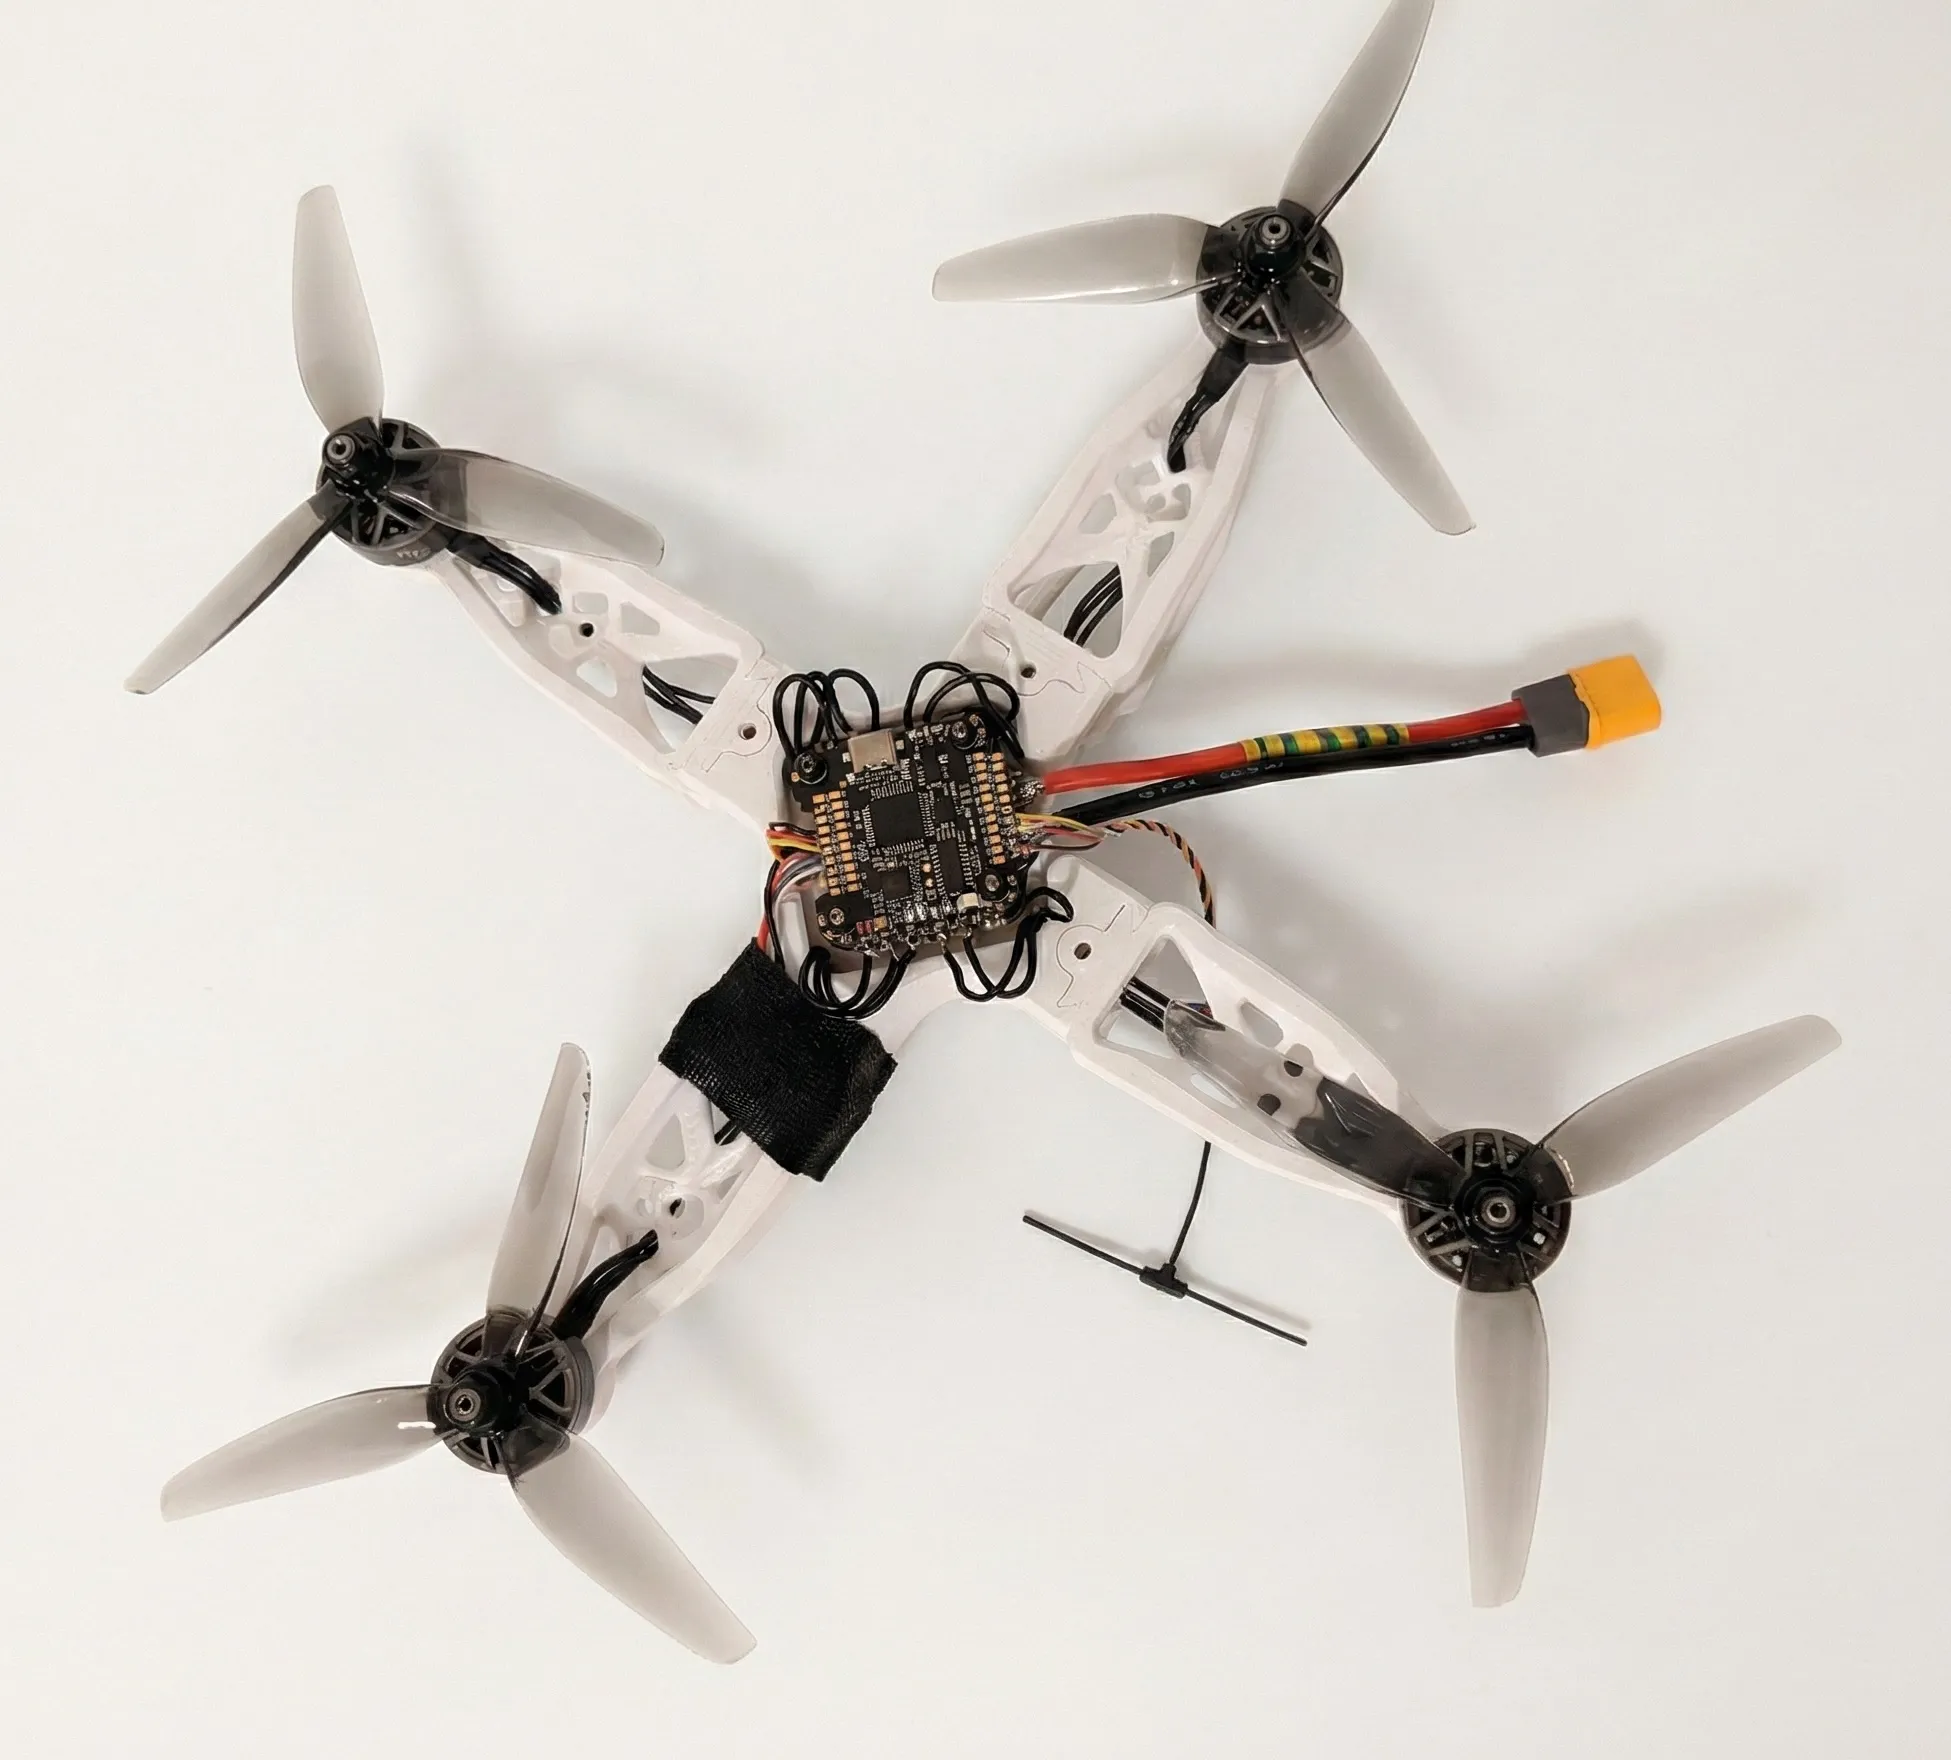
The final drone build after assembly and wiring.
The first takeoff was not calm.
I did it indoors in my apartment, which is objectively not a great idea. It is loud, it is risky, and if something is misconfigured, it can go from “cool hover” to “expensive chaos” in seconds. But it was around -10°C outside, so I made a questionable trade-off.
I triple-checked what I could, placed it on the floor, armed the motors, and slowly increased throttle.
It lifted.
It also had a slight tilt forward, and it drifted sideways into a drying rack I had set up as a “safety fence.” Not exactly a cinematic first flight, but it hovered. A pile of plastic and components that had been spread across my desk a few weeks earlier was now holding itself in the air, built by me, running code I configured, responding to controls I set up.
That moment is the payoff.
Final Thoughts and Next Steps
This build was one of the most satisfying side projects I have done in a while, because it sits right at the intersection of everything I enjoy: 3D printing, hardware assembly, electronics, software configuration, and a manageable amount of chaos.
If you are on the fence about building a drone, I would recommend trying it. The worst case is that you learn a lot faster than you would by only consuming tutorials. The best case is that you end up with something that flies, sometimes slightly tilted toward a drying rack, but still flying.
My next steps are practical. Fix the tilt, get more controlled flight time, and build confidence outdoors once the weather is less hostile. After that, I will decide whether adding a camera and video system is worth the extra cost and complexity. I am also tempted to pivot to a self-driving car project for a bit and come back to FPV later, because apparently I like hobbies that involve soldering and mild danger.